I put them all in a box, gave them to my student teacher and asked her to try them out first...before giving them to her BF. When the student needed help they put the red side of the cup facing up and continued to work or wait quietly at their desk. If they didn't need assistance or did not have a question, they put the green side of the cup up. This worked really well in with my gifted students, so the student teacher took them to give to her BF to use. He was teaching a different demographic of students and a different grade level (one grade higher) but he reported back that the cups worked really well for him. When he was finished his teaching block, he made his own cups and kindly returned my box to me. I put them away on a shelf and left them there for several years.
I pulled them out again this past year when I had a student teacher who was having difficulty managing the "student rush" when she was conferencing with students. In the pinch it was nice to have them pre-made, and she started using them right away. This technique worked for her too! She was able to gain some space, some time and her sanity. She was able to go around the room and meet with students while not disrupting the whole class.
I have used them successfully in a testing situation, but I usually just stick to the "silent time hand signals" I taught my class at the beginning of the year (pointer finger I need to talk, 2 fingers I need to leave my seat, 3 fingers I need assistance).
 |
| Click on the image above to read about how Dr.Jean uses cups in her classroom. |
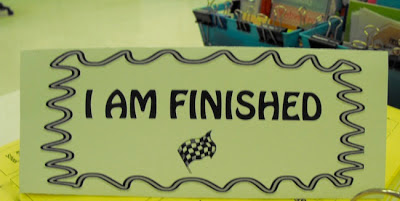
There was just something about using them that did not jive for ME. I like the concept, I like the simplicity, but somehow I wanted something different. I have seen where you can stack a red cup on a green cup and then just switch them out...you don't have to tape them. I am sure this would be more sturdy. You can even put a yellow cup in the middle. I love the idea but... The other day I saw a picture on Pinterest (what else is new?) that I liked so much that I have pinned it more than once! It was a picture of a trifold sign a teacher had made that said "I am working hard" "I need help" and "I am finished". I thought this was a really great idea.


What a great idea! :)
ReplyDelete~Jessica
Fun in PreK-1
Thank you! I thought it was a great idea when I saw it too! If you come back and visit again today I posted pictures of the sample I made when I got to school!
DeleteThanks for making these signs and sharing this idea. I did find the original post. It's here:
ReplyDeletehttp://mrshawksnest.blogspot.com/2011/08/vistaprint-and-my-flip-signs.html
I'm laways amazed at what good problem solvers and how creative teachers are! (Though after 25 years I shouldn't be!)
Tricia
Bookish Ways in Math and Science
Thanks for finding the original post! I hate it when I see something I like on Pinterest but the PIN does not lead to the actual post. I appreciate you finding the post so I could update my information on the blog!
DeleteWhat a WONDERFUL idea!
ReplyDeleteI will definitely try that out with my kiddos - thanks for sharing the freebie!
~Jessica
Joy in the Journey
Glad you like them. Come back today and you can see some pictures that I took and posted this morning! I printed some samples out on cardstock at school and they look great! I am going to laminate today!
DeleteYou will LOVE the pencil sharpener! I bought one about a month ago and I'm obsessed! The OCD person in me loves that they come out SO SHARP, EVERY TIME!
ReplyDeleteCan't wait to hear what you think!
Thanks for the 411 on the pencil sharpener. I hope I actually receive it as I don't think that company ships to Canada:( Winning it was really nice though anyhow. I hope you can use the flip signs…I posted some new pictures today if you want to see what they look like when they are printed and folded!
DeleteThe pencil sharpener is the bees knees. I seriously am in love with mine.
ReplyDeleteI really like the cup idea and the tags. I needed this idea. Thanks for sharing!
Kristi
Lucky In Learning
Kristi,
DeleteThanks for the feedback on the sharpener. I LOVE school supplies! Maybe that is why I became a teacher….Anyhow, if you pop back to my blog today you will see some new pics I took of the flip signs actually printed and folded. They turned out great! I am going to laminate today!
Hi, I'm trying to track down some awesome Canadian teacher bloggers who'd be interested in a blog hop for Canadian kids books with accompanying activities. Would you be interested in participating?
ReplyDeletehttp://readingwithmissd.blogspot.ca/2013/02/booking-across-canada.html
I have to say, I love the green and red cup idea, as well as your trifold idea. I'm looking forward to trying it with my firsties next year...thanks!
ReplyDeleteSusie
www.shafersshenanigans@blogspot.com
Thanks Susie! The primary teachers in my school want me to make them some sets of the tri-fold tents too! One thing I did once I laminated them that might work for you...I folded them and then added velcro tabs to the ends. This way I can disassemble them and store them in a semi-flat position. That way my class set of 30 doesn't take up too much space!
ReplyDelete