Before school even starts, I send home a letter to my incoming class. I want them to know a little about me, and a lot about our upcoming year. I know the parents and the kids themselves really enjoy getting mail from me at the end of August. This idea has become so popular and I have had so many people ask me to share my letter that I have added it in my TpT store this year.
 |
Click on image to get your own copy.
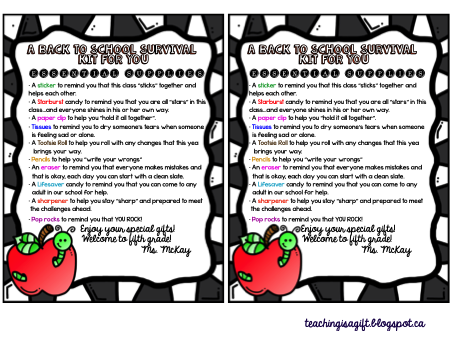
Start the day with a surprise! Each year I give out a Back to School Survival Kit to my students. I have been doing this long before there was Pinterest and TpT (Teachers Pay Teachers). This year I am making them with plastic, reusable water bottles from the dollar store, but in the beginning I used humble brown paper bags and fastened my note to the top.
 |
| Click on the image above to get your own copy of this EDITABLE file. |
I also like to start the day off the way I expect each to start...so I have my Daily Math bell work copied and on the student desks. It is a great way to introduce them to this daily procedure. You can read more about how I use Daily Math by clicking HERE.
 |
| Click on image to find out how to buy your own copy. |
After announcements and Daily Math, I have the students get up and out of their seats using my Back to School with Post Its activity. I put up the prompts up around the classroom and give each student 6 different coloured post its. I put them in small groups randomly and have them move from one prompt to the next. I give them a few minutes at each prompt to fill out a response (anonymously if they want) and then POST IT underneath the prompt.
If you are interested in doing this in your own classroom, you can grab a copy of my new, editable prompts by clicking on the image below.
Usually by this point it is recess so the kids go outside and I run to the washroom! After recess I like to introduce myself in greater depth and review my expectations for the year. I like to use a Powerpoint presentation that I insert a variety of teacher memes into. Most of my students have yet to be exposed to Powerpoint or memes, so they think it's new and novel.
This year I found this funny video online so I have added it to the end of my presentation. This should make the kids smile!
I have a packet of fun activities on each student desk. I want them to tell me a bit about themselves, and it gives me something for them to work on if I need a few minutes of time filled. You can find lots of great free ideas on TpT. I have created my packet from a variety of sources, and I tend to change it up each year based on feedback from previous years.
By now the French teacher is usually tapping her heels, waiting for me to finish my spiel. After that the kids go off to lunch and I go and try to fix or copy whatever I have forgotten to do before school.
After lunch, we review how to come into class and they start their first bell work for language arts. Last year I found that using the Nelson Communicating Skills workbooks the school purchases worked really well for after lunch bell work. I post the page number on my whiteboard BEFORE lunch, and they have their books out before we go to lunch. If you don't have workbooks such as these, you could use any daily grammar/or language program out there.
After we review our Communicating Skills answers and make sure our planners are filled out. I introduce my favourite art activity. I have written about it before here. This piece of art becomes a laminated desk mat which stays on the student desk all year. They usually take great pride in finishing it, as they know they will be looking at it all day, everyday.
Each student receives a large sheet of cartridge paper. Using a pencil, they make a border of 10 cm all around the page. This border will be filled with pictures of school supplies. I keep a large bin of different school supplies just for this project. I try to find interesting shapes for the students to trace. Using these found objects, students trace them around the outside border in pencil. I show them how to overlap the objects so that there are no overlapping lines. The more three dimensional the objects look, the better.
After students have traced as many objects as they can, the go back over them using a black, fine line marker. They also add as many line designs as they can at this point. I do not have them do the designs in pencil first as this will take too much time.
This does NOT get finished the first day! It usually takes an hour a day for the first week or so to finish this project. You can see the next step is to have students fill in the center of their desk mat. I allow them to put anything they want here, and this is where they are allowed to use COLOUR. Some students draw something to represent themselves, others bring in pictures of family from home. I allow them to be as creative as they want.
The very last step before I laminate them is to have students fill in all the white space in the border with tiny dots using their fine line marker. This technique can be ponderous, but the effect is amazing. Some students vary the size of the dots from one area to the next, some vary the number of dots and others just want it done! I rarely have a student who does NOT want to take their desk mat at the end of the year. Many tell me years later that they still have them on their desks at home.
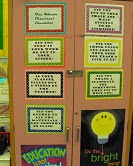
Usually by this point in the first day, it is time to pack up and go home. I introduce my students to my last minute checklist which is posted on the cupboards in my classroom.
As you can see from the photos, I recently updated my checklist posters. I am going to print and post them again this year. If you are interested in seeing the new ones up close, or if you would like your own copy, click on the image below.
After many years, I am still excited to go back to school each September. I have learned that if I have a plan, and some fun things for the students to experience on the first day, nobody has the first day jitters!


